How to Reset Canon EOS 7D Mark II DSLR Camera
Last Updated on June 20, 2022 by Nick
In the event the Photokina 2014, Canon officially released Canon EOS 7D Mark II. If the next generation usually carries only a slight increase from the previous generation, another case with the Canon EOS 7D Mark II. DSLR cameras with APS-C sensor from Canon’s sophisticated, bringing a series of new technologies and features, which is much higher than the Canon EOS 7D.
The first, the Canon EOS 7D Mark II still rely on multiple processors and APS-C CMOS sensor. The difference, the Canon EOS 7D Mark II is now equipped with the Dual DIGIC 6 and APS-C CMOS sensor 20 megapixel newly. Both will replace the Dual DIGIC 4 processor and CMOS sensor 18 megapixel APS-C used 7D. To take pictures in low light conditions, the Canon EOS 7D Mark II offers a choice of ISO 100 to ISO 16000 which can be increased up to ISO 51200. Continuos speed shoot cameras also increases with speed of up to 10fps.
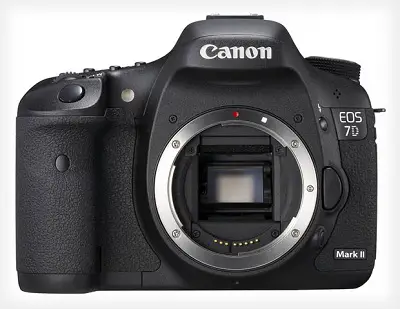 Image source: petapixel.com
Continuous shot his ability even more capable with support for more advanced autofocus technology. The camera is equipped with autofocus systems Cross Type AF 65-point, which is able to locate and lock the focus to -3EV, suitable for those who like to shoot in dim conditions. For excellent autofocus performance, Canon presents Autofocus Dual Pixels CMOS technology which is also there in the Canon EOS 70D. With this technology, the camera will be able to find the focus more quickly on the live-view mode. It is certainly very useful for those who like to record a video. Talking about video, the Canon EOS 7D Mark II can record Full HD 1920 x 1080 pixels at 60p. Unfortunately, Canon has not included Wi-Fi connection to the Canon EOS 7D Mark II. Instead, the additional available WiFi module, the WFT-E7A Version 2, which can be purchased separately.
Factory Reset:
To restore your Canon EOS 7D Mark II to its factory settings, follow these steps:
- Put the Camera in Manual Mode
- Press the [Menu] button
- Scroll over to the third subsection of the third set of menu options.
- Scroll down to the “Clear all Camera Settings” option by using the quick control dial
- Click the [Set] button. Scroll over to the [OK] button and click [Set] button again.
- When the factory reset has been completed, pull out the battery
- Look in the battery compartment, and you’ll see a little slider you can pull it.
- Behind this slider are the backup-battery hidden. Take this battery out for at least an hour, replace the backup-battery, and the “normal” battery.
Read also “How to Reset Canon PowerShot S200 2MP Digital ELPH Camera” and another user guides. Hopefully the article of How to Reset Canon EOS 7D Mark II DSLR Camera useful for you.
Reference: Canon EOS 7D Mark II manual
About The Author
yomita
Hi! Yomita here. Photographer and electrical device troubleshooter are some of my other interests. Writing and disseminating knowledge that helps people is something I like doing.
Where is this magical slider?? I only see one in the 7D mark i. Not in the mark ii. Have you legitimately used this camera or is this just seo? If so, can you post a photo rather than just words? Please.
Agree, this is just copy-pasted fluff. There’s no compartment in the 7DmkII like there is in the original 7D. Not sure how to change the cmos battery in this camera, it’s not mentioned at all in the instruction manual.
Matthew Lala above is quite correct. The instructions are for the 7D and not the 7D Mk II. The CMOS battery is now attached to the PCB board (?) and has no user access. The main camera battery / (ies) apparently trickle feed the CMOS battery and if you remove the main battery to store your camera, i.e. if not being used for a good while, the CMOS battery allegedly and eventually ‘dies’ and needs to be sent back to Canon Service Depot for replacing.
wow, thanks guys, I thought I was either blind or stupid !!!