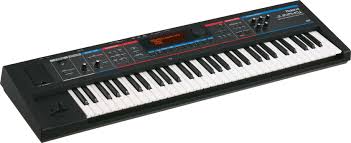
The Juno-D was the first in the newly resurrected Juno line when it was launched back in 2005. Aimed at performers and producers wanting portability and a great base of versatile sounds for a reasonable price, the Juno-D proved popular. The Juno-Di is an updated version of the Juno-D that brings it more up to par with the Juno-G and Juno-Stage models, which was introduced in 2009. It built to give you over 1,000 amazing sounds in the studio, onstage, or wherever you want to play, the lightweight and compact JUNO-Di can function for up to five hours via battery power. It has a friendly direct-access control panel for easy editing and a Song Player for larger-than-life performances. You can plug a microphone into the JUNO-Di and use its built-in vocoder to make cool vocal effects, or use the USB memory port and Song Player function to play full-band performances straight from the JUNO-Di.
According to several user reviews, they have praised a Roland JUNO-Di for the Versatile and full of very usable sounds; Pretty cheap; Portable. Also, some users have complained it for the Build quality isn’t amazing; The sounds aren’t jaw-dropping.
To restoring a Roland JUNO-Di to it’s factory settings, first press the MENU button, select “UTILITY” by using UP (∧) or DOWN (∨) buttons and press the ENTER button. Next, select the “FACTORY RESET” and press the ENTER button. When a message ask you “FACTORY RESET?”, press the ENTER button to execute the factory reset. Finally, when the factory reset has been completed, turn the power of the JUNO-Di off, then on again.
Warning! When you execute “Factory Reset”, the settings you made will be lost. Be sure you want to erase the memory and return the Roland JUNO-Di to its factory default state before continuing with this procedure. Hopefully the article of “Returning the Roland JUNO-Di Synthesizer Keyboard to it’s Factory Settings” can help you.
Reference: Roland JUNO-Di manual
Hey what's up Bimmers! Owning a BMW M8 comes with the responsibility of proper maintenance,…
Greetings, fellow Bimmer lovers! Today, we have an exciting topic to delve into: how to…
What's up Bimmer! Welcome to our guide on resetting the oil service light on your…
Wassup Bimmers? When it comes to maintaining your BMW M4 F82/F83/G82/G83, resetting the oil service…
Hey, what's up Bimmers! Welcome to the comprehensive guide on performing an easy oil service…
Hi, Bimmers! In the fast-paced world of automotive technology, staying on top of routine maintenance…
This website uses cookies.